Flaxseed & Flaxseed Oil

Standard

First, flax is a great source of fiber. Most Americans do not get enough fiber in their diet. Each tablespoon of flax contains about 8 grams of fiber. This helps keep the bowels regular. Because of all the fiber, be sure to start slow (say, with a half-teaspoon) and build up. Otherwise, you may experience bloating.

Second, flax is a plant source of omega-3. Once again, most Americans are short on their omega-3 fatty acids. These essential fatty acids (“essential” meaning they must be consumed because our bodies don’t make them) play an important role in the anti-inflammatory system of our body. Flax contains the shorter chain omega-3 called ALA (alpha-linolenic acid). Thus, it is not a replacement for fish or fish oil supplements that contain DHA (docosahexaenoic acid) and EPA (ecosapentaenoic acid.)

Third, flax contains lignans which reduce the risk of breast cancer in women and prostate cancer in men. The lignans alter the way your body metabolizes estrogens into safer forms.

As if this wasn’t enough, flax  has been shown to reduce hot flashes in menopausal women. To reap the benefits, this requires a daily dose of 2 tablespoons. And flax can normalize the menstrual cycle by supporting the second phase (the luteal phase).

Safety: Other than the bloating that may occur in a new user, flax is very safe. It’s a food that has been with us for thousands of years.

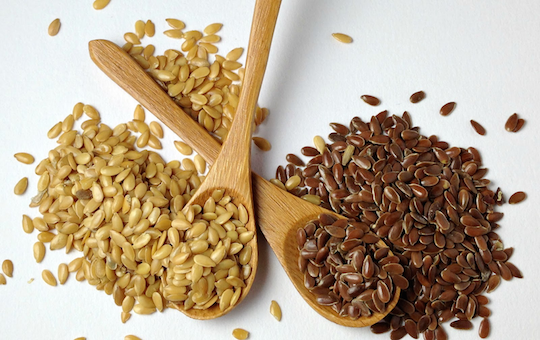
How to: Start slow and build up. Remember to grind it. (It is useful to get a coffee grinder for this purpose. Preground flax spoils, or oxidizes, quickly. Unground, the impermeable coating may make it pass right through you, and you won’t absorb any of the benefits.) Add it to cooked oatmeal, to pancake batter, or to yogurt. It has a nice nutty flavor. Don’t buy the oil as that eliminates the fiber and most of the lignans.

http://www.doctoroz.com/blog/victoria-maizes-md/benefits-flax


A rich source of healing compounds, flaxseed (also called linseed) has been cultivated for more than 7000 years. First cultivated in Europe, the plant’s brown seeds were regularly used to prepare balms for inflamed skin and healing slurries for constipation. Rich in essential fatty acids, or EFAs, flaxseed oil is used to prevent and treat heart disease and to relieve a variety of inflammatory disorders and hormone-related problems, including infertility.

The essential fatty acids (Omega oils)in flaxseed oil are one of its key healing components. EFAs are particularly valuable because the body needs them to function properly, but can’t manufacture them on its own. Essential fatty acids work throughout the body to protect cell membranes, keeping them efficient at admitting healthy substances while barring damaging ones.

One of the EFAs in flaxseed oil, alpha-linolenic acid, is known as an omega-3 fatty acid. Like the omega-3s found in fish, it appears to reduce the risk of heart disease and numerous other ailments.

Flaxseed oil is an excellent source of omega-3s: Just 1 teaspoon contains about 2.5 grams, equivalent to more than twice the amount most people get through their diets. Flaxseeds also contain omega-6 fatty acids in the form of linoleic acid; omega-6s are the same healthy fats found in vegetable oils.

Flaxseed oil only contains these alpha-linolenic acid (Omega 3 oils), and not the fiber or lignan components that the whole plant contains. Therefore, flaxseed oil provides the Omega 3 benefits, such as lipid-lowering properties, but not the laxative or anti-cancer properties.

Whole flaxseeds (not the extracted oil) are a rich source of lignans (phytoestrogens), substances that appear to positively affect hormone-related problems. Lignans may also be useful in preventing certain cancers and combating specific bacteria, fungi, and viruses, including those that cause cold sores and shingles.

Flaxseed may help to:

Lower cholesterol, protect against heart disease and control high blood pressure:

Several studies indicate that flaxseed oil, as well as ground flaxseeds, can lower cholesterol, thereby significantly reducing the risk of heart disease. Taking flaxseed oil may also protect against angina (chest pain) and high blood pressure. In addition, a five-year study done recently at Boston’s Simmons College found that flaxseed oil may be useful in preventing a second heart attack. It may also help prevent elevated blood pressure by inhibiting inflammatory reactions that cause artery-hardening plaque and poor circulation.

Counter inflammation associated with gout, lupus and fibrocystic breasts:

Omega-3 fatty acids appear to limit the inflammatory reaction associated with these conditions. In cases of lupus, flaxseed oil not only reduces inflammation in the joints, skin and kidneys, but also lowers cholesterol levels that may be elevated by the disease. Taking flaxseed oil for gout may lessen the often sudden and severe joint pain or swelling that is a symptom of this condition. In addition, the ability of omega-3 fatty acids to boost the absorption of iodine (a mineral often found in low levels in women suffering from fibrocystic breasts) makes flaxseed oil potentially valuable for treating this often painful condition.

Control constipation, hemorrhoids, diverticular disorders and gallstones:

As they are high in dietary fibre, ground flaxseeds can help ease the passage of stools and thus relieve constipation, hemorrhoids and diverticular disease. In those with diverticular disease, flaxseeds may also keep intestinal pouches free of waste and thus keep potential infection at bay. Taken for inflammatory bowel disease, flaxseed oil can help to calm inflammation and repair any intestinal tract damage. In addition, the oil may prevent painful gallstones from developing and even dissolve existing stones.

Treat acne, eczema, psoriasis, sunburn and rosacea:

The essential fatty acids in flaxseed oil are largely responsible for its skin-healing powers. Red, itchy patches of eczema, psoriasis and rosacea often respond to the EFA’s anti-inflammatory actions and overall skin-soothing properties. Sunburned skin may heal faster when treated with the oil as well. In cases of acne, the EFAs encourage thinning of the oily sebum that clogs pores.

Promote healthy hair and nails:

The abundant omega-3 fatty acids in flaxseed oil have been shown to contribute to healthy hair growth (in fact, low levels of these acids may cause dry and lackluster locks). Hair problems exacerbated by psoriasis or eczema of the scalp may respond to the skin-revitalizing and anti-inflammatory actions of flaxseed oil as well. Similarly, the oil’s EFAs work to nourish dry or brittle nails, stopping them from cracking or splitting.

Minimise nerve damage that causes numbness and tingling as well as other disorders:

The EFAs in flaxseed oil assist in the transmission of nerve impulses, making the oil potentially valuable in treating conditions of numbness and tingling. The oil’s nerve-nourishing actions may also help in the treatment of Parkinson’s disease, a degenerative disorder of the nervous system, and protect against the nerve damage associated with diabetes and multiple sclerosis.

Reduce cancer risk and guard against the effects of ageing:

The lignans in flaxseed appear to play a role in protecting against breast, colon, prostate, and perhaps skin cancer. Although further studies are needed, research undertaken at the University of Toronto indicates that women with breast cancer, regardless of the degree of cancer invasiveness, may benefit from treatment with flaxseed. Interestingly, the lignans may protect against various effects of ageing as well.

Treat menopausal symptoms, menstrual cramps, female infertility and endometriosis: 

Because the hormone-balancing lignans and plant estrogens (phytoestrogens) in flaxseed help stabilise a woman’s estrogen-progesterone ratio, they can have beneficial effects on the menstrual cycle, and relieve the hot flashes of perimenopause and menopause. Flaxseed may also improve uterine function and thus treat fertility problems. In addition, the essential fatty acids in flaxseed have been shown to block production of prostaglandins, hormone like substances that, when released in excess amounts during menstruation, can cause the heavy bleeding associated with endometriosis.

Fight prostate problems, male infertility and impotence:

The EFAs in flaxseed oil may help to prevent swelling and inflammation of the prostate, the small gland located below the bladder in males that tends to enlarge with age. Symptoms of such enlargement, such as urgency to urinate, may lessen as a result. The EFAs also play a role in keeping sperm healthy, which may be of value in treating male infertility, and they can improve blood flow to the penis, a boon for those suffering from impotence.

http://www.herbwisdom.com/herb-flaxseed-oil.html

Paleo Pizza/Pizza Crust

Standard

paleo-leap-68

Paleo pizza recipe

Serves 4

Crust ingredients

  • ½ cup coconut flour;
  • 1 cup almond meal;
  • 1 tsp baking powder;
  • 2 tsp garlic powder;
  • 4 eggs;
  • 3 tbsp extra-virgin olive oil;
  • ½ cup coconut milk;

Topping ingredients

  • A few tbsp tomato pesto or of your favorite tomato sauce;
  • 8 sun-dried tomatoes, chopped;
  • 3 artichoke hearts, chopped;
  • 8 button mushrooms, sliced;
  • 1 tbsp coconut oil, for cooking;
  • 50g-100g good quality cooked ham, shaved (amount depends on your preference);

newyorkstylepaleopizzacrust

NY Style Pizza Crust

1 tablespoon gluten-free yeast
1 tablespoon raw honey
1/4 cup warm water (should feel warm on the inside of your wrist, but not burn)

3/4 cup almond flour
3/4 cup tapioca starch
3/4 teaspoon sea salt

1 tablespoon olive oil (or other melted fat if you’re opposed to heating olive oil)
1 tablespoon egg whites (less than one egg)
1 1/2 teaspoons apple cider vinegar

and of course your favorite toppings!

pizza0

Cauliflower Crust Bacon Pizza

MAKES: 3-4 MINI PIES

ingredients:

365 organic tomato basil sauce
1 head cauliflower
2 egg whites
coconut flour (tropical traditions)
1 med-large onion
2/3 cup spinach
1/2 cup bacon bits
spices
garlic powder
Italian seasoning (oregano, marjoram, thyme, basil, rosemary, sage)
crushed black pepper

directions:

  1. Preheat oven to 400°F.
  2. Rinse and prepare cauliflower into a rice-like texture. You can finely shred in a food processor or grate by hand.
  3. Put cauliflower “rice” in a large pot and steam till soft. Set aside and let cool.
  4. Take ~3 strips of (beef) bacon, cook and shred into little bits.
  5. Cook spinach and warm up your sauce.
  6. Cut onion into rings and fry till soft and caramelized.
  7. Take your cooled down cauliflower and add spices, eggs whites and spoonful of coconut flour to bind it. Mix and separate into even portions.
  8. Place parchment paper on a baking sheet. Mold each portion into a pie crust on your paper and place into hot oven.
  9. Cook crust for 15 minutes or until it feels firm (it will depend on how thick you make the pies and how wet the cauliflower is.)
  10. Take out of oven and add warm sauce and layer your toppings. I start with spinach, then onions, and then bacon.

carrot crust

CARROT CRUST

Ingredients

  • 4 cups of grated, and squeezed* carrots
  • 2 tablespoons butter
  • 3 eggs
  • 4 tablespoons coconut flour
  • 1/2 teaspoon sea salt
  • freshly ground pepper to taste
  • 1/2 teaspoon cardamom (optional, and I included it for the lamb bastila, for which I made the crust)

Process

  1. Preheat the oven to 180C (about 350F). Prepare a springform cake tin as follows: butter the bottom and sides and line with parchment paper. The butter is used so the paper will adhere to the pan.
  2. Add some olive oil (or additional, melted butter) on top of the paper and with your hands or a paper towel, spread the oil around the parchment paper. Set aside.
  3. Peel about 6-8 large carrots. I used a hand grater to grate them. Then I squeezed the water (carrot juice) out of them and measured the “dried” results into 4 cups. (I used a dry ingredients U.S. measuring cup.)
  4. Place the grated carrots in a large bowl. Add the butter and eggs, and with your hands mix well, cutting the butter into the mixture.
  5. Add the coconut flour and spices, and knead until all is well blended.
  6. Scoop the carrot mixture into the prepared cake tin and using your hands, spread it out evenly to form a pie shell (covering the sides of the tin as well as the bottom).  
  7. Baking time depends on what you will make with the crust afterwards. I baked mine for 35 minutes and then baked it again with the filling another 25 minutes.

Pizza Crusts: http://paleononpaleo.com/paleo-pizza/

Creative Pizza Crusts: http://paleogrubs.com/pizza-crust-recipes

homemade nut milk

Standard

Store bought almond milk has a whole array of other ingredients and preservatives including a lot of sugar. You have to soak the nuts for at least 6 hours and preferably overnight. And because there aren’t preservatives to keep it shelf-stable and fresh, it’s really only good for 2 to 3 days in the refrigerator. Freeze any leftovers in ice cube trays for use later.

A Few Tips When Making Homemade Nut Milks

1. Sweetening: I actually tend to like my nut milks not too sweet, but adding 1 to 2 tablespoons of honey or agave is nice as is 1 teaspoon of vanilla extract. A lot of folks blend in 1 to 2 sweet Medjool dates for natural sweetness.
2. Straining: For many nut milk recipes, you’ll see the need for a “nut bag.” This is essentially a bag made of a substance much like a super fine weave cheesecloth. You don’t need this! I promise. Use a good-quality cheesecloth draped over a colander and you’re good to go.
3. Leftover Pulp: After making your homemade nut milk, you’re going to be left with a few cups of perfectly good pulp. Some recipes instruct you to toss it. I can never stand to do so, so I dry mine out on the lowest setting of my oven (170°F in my case) with the oven door cracked ajar. This takes 6 to 7 hours and is obviously not ideal in the hotter summer months, but it results in really delicious almond meal that you can use in cookies, breads, and muffins. If you’d rather, it makes pretty great compost for the garden instead.


YIELD
3.5 CUPS
PREP TIME
10 MINUTES

Ingredients:

  • 1 cup raw almonds, soaked in water
  • 3.5 cups filtered water
  • 2-4 pitted Medjool dates*, to taste (I used 2 large)
  • 1 whole vanilla bean*, chopped (or 1/2-1 tsp vanilla extract)
  • 1/4 teaspoon cinnamon
  • small pinch of fine grain sea salt, to enhance the flavour

Directions:

  1. Place almonds in a bowl and cover with water. It’s preferred to soak them overnight (for 8-12 hours) in the water, but you can get away with soaking for 1-2 hours in a pinch.
  2. Rinse and drain the almonds and place into a blender along with filtered water, pitted dates, and chopped vanilla bean.
  3. Blend on highest speed for 1 minute or so.
  4. Place a nut milk bag over a large bowl and slowly pour the almond milk mixture into the bag. Gently squeeze the bottom of the bag to release the milk. This took me about 3-5 minutes to get all the milk out.
  5. Rinse out blender and pour the milk back in. Add the cinnamon and pinch of sea salt and blend on low to combine.
  6. Pour into a glass jar to store in the fridge for up to 3-5 days. Shake jar very well before using as the mixture separates when sitting. Enjoy with Peanut Butter Chocolate Chip Cookies for a real treat. This milk is also lovely with cereal.

Notes: If your dates or vanilla bean are dry/stiff, soak in water to soften before use. You can also use another sweetener of your choice like maple syrup. Same goes for vanilla – feel free to use vanilla extract for a more subtle vanilla flavour.

Soak a cup of raw almonds overnight or for 8 hours or longer. Rinse and drain the almonds and pop them into your blender along with 3-4 cups of filtered water (I like 3.5 cups water in this recipe).
almonds

My favourite flavour combo is a whole vanilla bean, a couple Medjool dates, cinnamon, and a pinch of sea salt. It’s intensely vanilla flavoured with notes of caramel and cinnamon. The secret to an intense vanilla flavour is blending an entire vanilla bean. Just chop it up and toss the whole bean into the blender. You’ll be left with some amazing vanilla almond milk. Of course you can always use vanilla extract or liquid sweeteners too. If using the dates and/or vanilla bean, add them along with the almonds and water. If you simply want to add a liquid sweetener or vanilla extract, you can add them now or at the end. Your call.

Blend for 1 minute on the highest speed.

blender
Purchase a nut milk bagPlace your bag over a large bowl and slowly pour in the milk.

Get of the milk out, I was left with about 1 cup of almond pulp. nut milk bag

You can use the almond pulp for all kinds of things like oatmeal, hummus, homemade granola, smoothies, cookie or muffin batter, crackers, or you can even dehydrate it and then blend it up to make almond meal. Oh, and you can freeze it too.

Homemade almond milk can be cheaper than store bought or it can be more expensive; it really depends on your ingredients. When I see bulk almonds on sale, I like to stock up and buy a big bag. Pop a bag in the freezer to ensure they stay fresh.

To avoid almonds sprayed with the chemical propylene oxide, please see this article and this handy guide to common brands that do and do not use the chemical. If you are concerned about propylene oxide on your almonds be sure to check with your almond retailer to see what sterilization method is used.

http://ohsheglows.com/2013/01/24/my-favourite-homemade-almond-milk-step-by-step-photos/


almond

Sprouted Almond Milk: 

Nuts contain some phytic acids, which are called “anti-nutrients” because they bind to minerals and prevent their uptake.  Soaking removes the phytates to enable the nutrients in the nuts to be more bio-available.  Sprouting further improves the nutrition and digestibility, because a sprouted seed, nut or grain basically turns into a plant after they are sprouted, which the body is better able to digest and absorb nutrients from.  Sprouting is just a longer soak, and requires that you drain/replace the water a couple times of day (approx. every 12 hours) until little ‘tails’ start to poke out of the end of the nut.

http://www.livebeaming.com/2013/06/got-sprouted-almond-milk/

How to Sprout: http://www.almondessence.com/photos/photos.html

http://www.projectraw.org/recipe/raw-sprouted-almond-milk


Try a Recipe: 
• Homemade Almond Milk – Lovely Morning
• Homemade Cashew Milk – Alana’s Pantry
 Creamy Chocolate Hazelnut Milk – Always Order Dessert
• Spiced Hazelnut Milk – Roost
• Homemade Pistachio Milk – Food Babe

http://wellnessmama.com/366/organic-almond-milk/

http://www.thekitchn.com/diy-nutmilks-5-easy-and-nourishing-recipes-176008

http://www.bonappetit.com/recipe/basic-nut-milk

Cultured Coconut Water/Keifer

Standard

Coconut water kefir is a fantastic alternative to milk kefir for dairy-intolerant folks.  It is loaded with minerals and assists in healing the digestive system and the liver.  All in all, it’s a wonderful way to build up the immune system.

There are two ways to make coconut water kefir: 1) with a starter culture like Body Ecology or 2) with water kefir grains.  If you are immune compromised, I highly recommend starting your water kefir journey with a starter culture and then moving to grains once you get stronger.  Check out Young Coconut Kefir andYoung Coconut Kefir 2.0 for recipes using a starter culture.

If you are generally healthy or are budget conscious, making water kefir with grains is the way to go.

Supplies Needed:

  • 8 cups coconut water
    • Budget conscious option #1: water from 2 young coconuts + 1 L tetra pack of coconut water
    • Budget conscious option #2: 1-12 oz bottle of raw coconut water (Harmless Harvest or Exotic Superfoods) + 1 L tetra pack of coconut water
    • Budget conscious option #3: Buy a case of coconuts from your local Asian market.  My neighbors buy an entire case for $9.99!
    • Best quality: 8 cups Harmless Harvest or Exotic Superfoods raw coconut water

*I don’t recommend using all boxed coconut water because you will be missing out on all of the valuable enzymes found in raw coconut water.  Make sure at least 20% of your batch is raw.

Notes:

  • If you are using fresh coconuts, try to have them opened in the store to save yourself time.  Our local Whole Foods does this no problem.
  • You can use all fresh coconut or a combination of fresh and boxed coconut water.  When I was really sick, I used all Harmless Harvest or Exotic Superfoods coconut water because it’s the best quality and bottled super fresh.  Now, I use two fresh coconuts and then make up the difference with a 1-L bottle of boxed coconut water because it’s more budget-friendly.
  • Save the meat from your fresh coconuts to make yogurt!

Coconut-water-collage

Instructions:

Add 8 cups of coconut water to your 1/2 gallon jar.  When using fresh coconuts, always pour the water out of each coconut into a glass measuring cup before adding it into the fermentation jar to make sure it’s not pink.  If it’s pink, it’s not safe for fermenting.  Return it if you can!

Add 6 TBSP water kefir grains to the jar and cover it with a dishtowel.  Secure the dishtowel with a  rubber band and let it sit at room temperature for up to 48 hours.  Taste test it every 12 hours, because the fermentation time will depend on the temperature of your kitchen.

When it’s done, it will turn from clear to cloudy and be slightly effervescent.
At this point, you need to strain out the grains.  Place your wide mouth funnel on top of a clean 1/2 gallon mason jar and set your fine mesh strainer on top of the funnel.  Pour the finished kefir through the strainer to catch the grains.  Store the grains in the fridge in sugar water until you need them again.  I only do one batch a week, so mine hang out in the fridge the rest of the time.

Update: I am no longer putting them in the fridge between uses.  They were doing fine for a long time, but suddenly stopped growing.  It seems they don’t like being put into cold storage too frequently.  So, I have started making regular water kefir in between batches of coconut water kefir.  I use the regular water kefir to make my husband kefir soda.  He’s so happy I am making it again! I’ll post about that soon.

Secure your mason jar with a tight-fitting lid and transfer it to the refrigerator.  It is delicious served with a squeeze of lemon juice or a drop of lemon essential oil.*You can do a second ferment to flavor your kefir and add more carbonation, but my little one prefers hers plain, so I skip this step for now! No sense making extra work for myself.  Delicious options for second ferments include fresh strawberries or strawberry puree, lemon juice & fresh ginger, dried fruits such as raisins or cherries, and pomegranate concentrate.  I’ll have to share about second ferments in a future post!

http://www.thishouseofjoy.com/2014/04/24/how-to-make-coconut-water-kefir/


Cultured Coconut

For those who are dairy intolerant, cultured dairy products like yogurt and kefir must be avoided. However, many cultured products can be made with coconut milk or coconut water, to fit a variety of diets or dietary restrictions.

Coconut Water Kefir

Coconut water kefir can be made from either fresh coconut water from a young coconut or pasteurized coconut water found in aseptic containers from a health food store. Use Water Kefir Grains or a powdered Kefir Starter to culture coconut water.

NOTE: If culturing coconut water kefir using water kefir grains, the grains must first be activated and well-established using sugar water. Once the grains are making good water kefir alternate with batches of sugar water and coconut water, to keep the grains healthy.

If using fresh coconut water, choose young coconuts that are light in color rather than the older brown, fuzzy coconuts. Hold the coconut down firmly, pointy end facing your dominant hand and your other hand holding the coconut on its side. Use a serrated knife to saw off the husky at the pointy end until a couple of square inch area is removed or until the inner light brown husk is showing.

Very carefully saw off the top half inch which should create a lid revealing a 1-2 inch hole with the white inner meat exposed. When halfway into cutting off the lid, turn the coconut so that the lid faces upward, to keep the coconut water from spilling out.

Coconut Milk Kefir

If you desire a more milk-like cultured product, cultured coconut milk kefirmay be the answer. Use canned or boxed coconut milk, or make your ownhomemade coconut milk.

Coconut milk kefir is a bit thinner than yogurt and can be drunk plain or used in smoothies, parfaits, or desserts.

Coconut Milk Yogurt

Finally, you can make non-dairy yogurt using coconut milk and a variety of starter cultures. Non-dary milk requires a thickener to set into a spoonable yogurt. Try these recipes to get started, or choose a thickener that works for you:

Coconut Milk Yogurt using Gelatin as Thickener

Coconut Milk Yogurt using Pectin as Thickener

http://www.culturesforhealth.com/coconut-water-kefir-recipe/

The natural goodness of coconut water is further enhanced with the addition of probiotics from the water kefir culture.

Ingredients

  • 1 quart coconut water
  • 3 tablespoons water kefir grains
  • Optional flavoring: 1 cup fresh fruit (mixtures of berries, lemon, etc. work best)

Instructions

  1. Activate dehdyrated grains first using sugar water. Once the grains are making good water kefir using sugar water, they are ready to use with coconut water.
  2. Place the water kefir grains in the coconut water. Cover the jar loosely and allow the kefir grains to culture the coconut water for 24 to 48 hours. Once the culturing process is complete, remove the kefir grains.
  3. To add fruit flavoring, puree together the coconut water kefir and the fruit.
  4. Note: Ideally water kefir grains should be cultured in sugar water (1/4 cup sugar and 1 quart water) for 24 to 48 hours between batches of making coconut water kefir. The sugar water will feed and refresh the kefir grains keeping them healthy for the long term.

Culturing Coconut

Coconut can be cultured and fermented in many different ways and at different stages of life. Coconut Milk and Coconut Milk Yogurt are made from the familiar hairy, brown, mature coconuts. Coconut water kefir and cultured coconut pudding, however, are made from young coconuts.

Instead of appearing hairy and brown, a young coconut, like all things in their youth, is green and smooth. Often the green outer shells are cut off before they are shipped to U.S. markets. Look for either the green shell or a cylindrical white “husk” if the outer shell has been removed.

You may not see them in the produce section of your big-chain supermarket, but they are readily available in Asian, Latino, and other ethnic or farmers’ markets. Many health food stores will carry them upon request.

Young coconut water is best fermented by adding either water kefir grains or a prepared kefir powder to it. Kefir (pronounced kuh-FEER) is a unique combination of probiotic bacteria and healthy yeast which consume the sugars in the coconut water, making the drink bubbly and delicious—like soda, but without all the chemicals and sugar.

Many people find kefir significantly more effective than probiotic supplements at dealing with digestive issues and candida overgrowth. Babyzilla and I rely on coconut water kefir and other fermented foods to help heal our leaky gut issues and food sensitivities.

And since Babyzilla and I cannot eat dairy products (even raw ones, darn it!), we eat a few coconut products in their place. Coconut water kefir is one of them.

The other benefit to drinking kefir is actually in the coconut water itself. Coconut water is a nutrient-dense beverage filled with minerals, vitamins, antioxidants, amino acids, enzymes, and growth factors, and it also has only a fifth of the sugar found in most fresh fruit juices. Fermenting it reduces the sugar even further and makes all of these nutrients even more available to your body.

If you make coconut kefir out of water kefir grains, you only have a one time cost of buying them, so they are much cheaper in the long run. You can also use the grains for fermenting other things as well. (Do not make coconut water kefir from dairy kefir grains; it will not ferment well, and the grains will quickly die without real milk to consume.)

If you make coconut kefir from powdered kefir packets, you can save a little portion of your batch and then add it to a new jar of coconut kefir. You can keep repeating this process of saving a bit from one batch and adding it to the next until it loses it’s fermenting power. So while the packets are a bit expensive, you can stretch them out over a couple of batches.

Coconut Water Kefir

(Makes about 1 quart)

Tools

  • 1 quart latch-lid or mason jar
  • Candy thermometer
  • Wooden spoons
  • Clean kitchen towel
Ingredients
Directions
  1. Sterilize all your equipment, especially your jars.
  2. Carefully open coconuts using a cleaver or hatchet, conserving the water. (How-to video here)
  3. Conserve the young coconut spoonmeat inside and use for Cultured Coconut Pudding (recipe below), smoothies or desserts.
  4. Heat the coconut water to about 90 degrees.
  5. Add 1 packet of kefir culture starter and stir until completely dissolved. If using kefir grains, just stir in thoroughly; they won’t dissolve.
  6. Pour the inoculated water into a closeable, sterile jar.
  7. Ferment at 72-75 degrees F for 36-48 hours. In the summer, this could mean your countertop. In winter, the top of the fridge. Avoid agitating the jar.
  8. The water will get milky white and usually a bit of bubbles will form on top. The taste should be slightly tart and tangy with only a little of the original sweetness.
  9. Refrigerate after fermentation. It will continue to ferment, but the process will be much slower. Will last about a week.
  10. Save 1/4 cup from each batch (including the kefir grains, if using) to inoculate the next quart of kefir, instead of using a new packet. (Or save 1/2 cup to make 1/2 gallon, or 1 cup to make 1 gallon)
  11. This procedure can be repeated up to 7 times. Inoculate a new batch within 3 days of removing culture from the previous batch.
  12. Stir in crushed fruit if you wish, and enjoy with meals and before bed to restore your digestive health.

Cultured Coconut Pudding

Tools

  • Blender
  • Glass or ceramic container with lid
Ingredients
  • Meat from 3-4 young coconuts
  • 1 Tbsp. water kefir grains or 1/2 kefir packet (where to find kefir grains and kefir powders)
  • Pure water or coconut water
  • 1/2 tsp. cardamom, cinnamon or nutmeg
  • Fresh fruit (optional)
Directions
  1. Open the young coconuts and conserve most of the the water for Coconut Water Kefir (recipe above). The meat should be white. If it is pink or gray, it should be discarded.
  2. Scoop the meat out with a strong spoon or spatula.
  3. Rinse any brown skin off the meat.
  4. Put the coconut meat in a blender and purée with just enough water to create a pudding-like consistency.
  5. Add half a packet of kefir starter culture or a teaspoon of kefir grains. Pulse to incorporate.
  6. Transfer the pudding to a glass or ceramic container, making sure there are a few inches of room on the top for the pudding to expand.
  7. Cover the container and let it ferment on your countertop or on top of your fridge at about 72-75 degrees for 7-10 hours.
  8. After fermentation, add cardamom or cinnamon and nutmeg and stir in.
  9. Refrigerate. It will last about 3 days.
  10. Enjoy for dessert with fresh strawberries or other toppings.

Original article at: http://www.smallfootprintfamily.com/coconut-water-kefir#ixzz3IV7SWAQP

http://www.youngandraw.com/how-to-make-coconut-water-kefir-1/

Build Muscle & Lose Fat simultaneously

Standard

Why Losing Fat and Gaining Muscle is Tricky

There’s a good reason why many people believe wholeheartedly in the old bodybuilding adage that you can’t build muscle while cutting fat, and must deal with getting fat if you want to build any real muscle.

Building muscle while burning fat–achieving a “body recomp” as it’s called–doesn’t come with haphazard effort. It requires that you do a bunch of little things right, with both your diet and training.

Why is that, though? What is the physiological barrier that we’re running up against?

Well, I’ve answered this in other articles, but I’m going to give a summary here in case you missed them.

The problem we must overcome to build muscle while we burn fat has to do with something called protein synthesis. To quote my previous article on muscle recovery:

“Every day, our muscle cells go through a natural process whereby degraded cells are eliminated, and new cells are created to take their place. This process is known as ‘protein biosynthesis,’ or ‘protein synthesis.’

“Under normal health and dietary circumstances, muscle tissue is fairly stable, and the cycle of cellular degradation and regeneration remains balanced.  That is, the average person doesn’t lose or gain muscle at an accelerated rate–his or her lean mass more or less remains level. (Well, we actually slowly lose lean mass as we age, but you get the point.)

“When we engage in resistance training, we damage the cells in our muscle fibers, and this signals the body to accelerate the normal rate of protein synthesis to repair the large amount of damaged cells.

“Our body is smart about it, too.

“It doesn’t want to just repair the muscle fiber to its previous state–it wants to adapt it to better deal with the type of stimulus that caused the damage. That is, it wants to add cells to the muscle fibers, which makes them bigger and stronger.

“Thus, what we think of as just “muscle growth” is actually the result of protein synthesis rates exceeding protein breakdown rates. At the end of, let’s say, every 24-hour period, if your body synthesized more muscle proteins than it lost, you gained muscle. If it didn’t, you didn’t.”

Now, let’s apply that knowledge to the issue at hand.

In order to lose fat, you need to give your body less energy (food) than it burns every day.This is known is creating a “calorie deficit.”

No calorie deficit, no losing fat, period.

There are physiological changes other than fat loss that occur when you do this though. The two primary negative effects are:

That is, a calorie deficit reduces your body’s ability to properly repair the damage you cause to your muscles through exercise (to build its muscles bigger and stronger).

So, now that you have a better understanding of the problem, let’s talk about what it takes to overcome it.

How to Build Muscle and Burn Fat at the Same Time

Just because your body can lose fat while building muscle doesn’t mean it comes easily.

The first thing you should know is that even when you do it right, muscle growth during a body recomp is slower than muscle growth during a proper “bulk.” As covered earlier, you are fighting an uphill battle in terms of protein synthesis, no matter how you cut it.

So be patient when you strive to build muscle and burn fat. Wild claims on the Internet about losing double-digit amounts of body fat and gaining the same in muscle are either lies, or involved the use of various drugs.

Based on my experience, here are the key points for effectively gaining muscle and losing fat:

Follow a set meal plan that keeps you in a moderate calorie deficit.

The more you restrict your calories, the more protein synthesis is inhibited.

Thus, it’s very important that you don’t try to rush your diet by putting yourself in a large (greater than 20%) daily calorie deficit.

I give a very simple formula for weight loss in my books that results in about a 20% daily caloric deficit if you’re exercising 4-6 hours per week:

  • 1.2 grams of protein per pound of body weight, per day
  • 1 gram of carbohydrate per pound of body weight, per day
  • .2 grams of fat per pound of body weight, per day

This gives you a good starting point, and you can adjust up or down as needed

Oh and in case you’re worried that eating that many carbs per day will prevent you from losing weight, rest easy–eating carbs does not inhibit weight loss. In fact, keeping your carbs moderate/high is an important part of building muscle while losing fat, mainly because ithelps preserve your strength in the gym, and the insulin your body produces to process the carbs helps prevent protein breakdown.

So, once you have your daily numbers, the next step is to create a meal plan–an exact list of foods you can eat every day to hit those numbers.

The easiest way to do this is to open Excel and www.calorieking.com, and start piecing together meals using foods that you like.

Play with meal frequency and add and subtract foods as desired until you have a daily eating schedule that fits your schedule, lifestyle, and nutritional targets.

Then just follow that plan every day, throw in a cheat meal once per week where you eat more or less whatever you want, and you’re good to go.

With proper dieting, you’re looking to lose 1 – 2 lbs of fat per week, you should never feel starved, and you should stay strong in the gym.

Focus on heavy, compound weightlifting.

The oft-repeated advice to focus on high-rep workouts to really “shred up” is idiotic.

Getting that coveted “shredded” look is only a matter of getting your body fat low enough. One style of lifting will not make you look “more shredded” than another.

As you may have already realized, to build muscle while losing fat, you simply want to do what works best for inducing muscle growth:

Focus on heavy (4-6 or 5-8 rep range), compound movements like the squat, deadlift, bench press, and military press, and train with a moderate workout volume (9-12 heavy sets per workout).

Some people might scoff at this advice and talk about the important of the “hypertrophy” rep range of 10-12, and I address this in my definitive guide to muscle growth, and in my book Bigger Leaner Stronger.

The big “secret” behind the high-rep, high-volume workouts espoused by many fitness models and bodybuilders is…drugs. It’s really that simple.

Working in the 12 – 15 rep range for 2 – 3 hours per day is GREAT if you’re chemically enhanced because your body can actually repair all that damage. It just can’t if you’re natural though.

Do HIIT cardio.

High-intensity interval training (HIIT) is really all you should be doing if you want to maximize muscle growth while losing fat.

Why?

For two primary reasons:

  • HIIT burns more fat per minute than steady-state cardio. 

This has been proven againagain, and again–it’s finally just an indisputable fact.

study conducted by The University of Western Ontario gives us insight into how much more effective it really is, as well. Researchers had 10 men and 10 women train 3 times per week, with one group doing 4-6 30-second treadmill sprints (with 4-6 minutes of rest in between each), and the other group doing 30-60 minutes of steady-state cardio (running on the treadmill at the “magical fat loss zone” of 65% VO2 max).

The results: After 6 weeks of training, the subjects doing the intervals had lost more fat. Yes, 4-6 30-second sprints burns more fat than 60 minutes of incline treadmill walking.

  • HIIT preserves more muscle than steady-state cardio.

Because of the hindered protein synthesis rates, preserving muscle is particularly important when you’re trying to build muscle while losing fat.

One of the ways HIIT does this relates to growth hormone production. Research has shown that HIIT spikes GH levels higher than steady-state cardio does, and growth hormone is a powerful muscle preserver.

Furthermore, research has shown that the longer your cardio sessions are, the more they impair strength and hypertrophy. That is, the shorter your cardio sessions are, the more muscle you preserve.

Thus, I recommend no more than 20-30 minutes of HIIT per session, and no more than 3-4 sessions per week. This cardio schedule will provide you with a large boost in fat loss while minimizing muscle loss.

Get enough sleep.

Not getting enough sleep hurts both aspects of your efforts to build muscle and lose fat.

Sleep needs vary from individual to individual, but according to the National Sleep Foundation, adults need 7–9 hours of sleep per night to avoid the negative effects of sleep deprivation.

Supplements to consider taking.

I saved this for last because it’s the least important, but it is worth mentioning.

I’ll keep it short and simple. Here are the supplement you should consider taking:

http://www.muscleforlife.com/build-muscle-lose-fat/


The Right Amounts

One of the single, most imperative principles in this plan is to eat the right amounts of macronutrients (protein, carbohydrates and fats). By manipulating these foods and staying strict with the guidelines your goals will soon be in range. Diet is so important that without adhering to these principles you will surely never reach your physique goals.

Protein: As the main source for building muscle, protein is absolutely necessary for your muscle-building strategy. Take in around 1 to 1.5 grams of protein per pound of bodyweight (this equates to 180-270 grams for a 180 pound individual). This will guarantee that your muscles will be getting the correct dose of amino acids for maintaining and building muscle tissue. Some prime sources are chicken, lean steak, fish, turkey, ground meat, eggs, cottage cheese, Greek yogurt and protein powders.

Carbohydrates: Carbohydrate is a great muscle-sparing energy source. This particular macronutrient will be drastically manipulated as the diet plan goes along and will play a major roll in its success so be extremely mindful of your intake on a daily basis. Be sure to have an intake mainly of complex carbohydrates and fiber. Sources include brown rice, wild rice, sweet potatoes, whole wheat bread, wheat pasta, vegetables, some fruits and Ezekiel products.

Fats: Never count out a healthy fat. Certain fats are essential regarding maintaining hormones such as testosterone, increasing fat burning and aiding energy levels. Healthy fats will be utilized to replace carbohydrate on certain days to keep blood sugar levels steady and help with satiety. Good sources include avocado, walnuts, almonds, olive oil, natural peanut butter, some egg yolks and sunflower seeds.

Light the Furnace!

Now let’s look at how we can implement these macronutrients and manipulate them in such a way as to build more strength and mass while torching our fat stores. Protein levels will stay somewhat the same throughout the plan. You need that steady stream of amino acids to feed to the muscles for recuperation and repair to take place. Try out one gram per pound of bodyweight and assess your progress. If you find yourself stalling, try to up it to 1.25 or 1.5 grams per pound and then reassess. That is about as high as you will want to go with protein – the rest is up to carbohydrate and fat manipulation. Give each change in protein amount about four weeks before reassessing.

Here is the tricky part. Now you will start to manipulate carbohydrate in such a way as to trick the body into delving into its fat stores for fuel. You will have high, medium and low consumption days. You will eat low carbs for two to four days followed by medium and high days. On the low days your body will burn fat for fuel and save muscle so as long as your protein intake is high enough. Before you starve your body of energy after so many days of low carbs (which if prolonged could lead to lower testosterone levels and metabolism) you will have a day of moderate carbs and another day of high carbs.

This will shuttle in fuel to the muscle, rev back up your metabolism and be burned without storing body fat. Carbohydrate intake will be approximately .5 grams per pound of bodyweight for low days (90 grams for a 180 pounder), 1.5 grams per pound on medium days (270 grams) and 2.25 grams per pound on high days (405 grams).

Fat intake should hover around .25 grams per pound of bodyweight or 20-30% of total calories. However, on low carbohydrate days it would be wise to increase your healthy fat intake slightly. This will ensure your hormone levels will stay steady and will supply you with ample energy for your grueling workouts. On the low carb days simply increase your fat intake by 50%. Remember that one gram of fat has over twice the amount of calories of carbs, so a little goes a long way. For example, if you had half of an avocado on a salad, now on low carb days you will eat 3/4 of an avocado.

http://www.bodybuilding.com/fun/build-muscle-burn-fat-simultaneously.htm


Never Eat Carbs by Themselves

When attempting to lose bodyfat, insulin control is crucial. The total amount of insulin released by the body isn’t related to just how many carbohydrates you eat but how fast those carbs are digested. Refined carbs digest quickly, raising insulin levels substantially, which is why you should avoid them. But if you do happen to eat, say, a bowl of cold cereal (typically a fast-digesting carb), you can still take measures to ensure those carbs digest more slowly. This will cause less insulin to be released and therefore have less of an impact on your ability to burn fat.

Do This: One way to slow digestion is to eat carbs with protein and small amounts of fat. Never eat carbs alone. Accompany that bowl of cereal, for example, with scrambled egg whites or cottage cheese. Alternatively, you could eat plenty of vegetables, such as broccoli, cauliflower, green beans and green salads, with your meals. These foods actually slow the breakdown and digestion rate of all carbohydrates.

Never Eat Carbs Before Bed

Once again, it’s about hormones. At night your insulin sensitivity decreases, meaning your body must release more insulin than usual to put any carbohydrates you eat at night to use in the body. And by now you know that higher insulin levels can decrease fat-burning and enhance fat storage. In addition, the body naturally produces a fat-liberating hormone called growth hormone (GH) within the initial 90 minutes of sleep.

GH not only increases fat-burning but is required to build mass and strengthen the immune system. Yet carbs put a damper on GH release, so it’s ideal to go to bed under one of two scenarios: on an empty stomach or, even better, having consumed only protein, no carbs. This allows blood glucose – the high-tech name for digested carbs circulating in the blood – to remain low, which facilitates the rise in nocturnal GH production.

Do This: Don’t eat anything about three hours before bed. A better option is to eat only protein meals the final four hours before bed, with one protein meal immediately before bedtime that includes only protein, such as a casein shake, low-fat cottage cheese or chicken breast. You can, however, eat a small serving of vegetables here if you wish.

Use Nitric Oxide at Night

Nitric oxide (no) is the compound that opens everything up and, not surprisingly, it’s one of the best fat-burning products on the market. NO supports “the pump” when taken before training, enhancing blood flow to muscles by allowing more blood to make its way to tissues, including muscles, which can help maximize hypertrophy and boost metabolism. This arginine-based supplement is also effective when taken before bed, when it can exert a profound surge in GH levels and support fat-burning.

Do This: Within 30-60 minutes of bedtime every night, take a 5-10-gram dose of a nitric-oxide supplement that doesn’t contain caffeine on an empty stomach.

Leangains Workout Plan Overview

Standard

The Leangains workout that I do is modified to my goals but this is very close to the recommendation. I workout Monday, Wednesday and Friday and rest all other days. I almost exclusively use barbells.

My goal is to put my body under maximum amounts of stress in short bursts then get the hell out of the gym. No burnouts, no screwing around. Some days I do 5 minutes of abs and/or more accessory work but I do it knowing that I am just having fun.

*Tip: I have noticed that I get most of my shoulder/back pulls and injuries during this “fun” time and rarely do it anymore.

I do 2 working sets:

I do a few warmup sets on each exercise before I move to the working sets. The goal of the warmup sets is to get my body ready to be put under a lot of stress. Below is an example, obviously you would adjust for your own warmups.

Example: Bench Press Warmup Sets

  • Warmup Set 1: Just the bar for 10 reps
    • This gets your joints moving and prepares your body to handle weight. This also helps me practice my form for the heavy sets
  • Warmup Set 2: 95lbs for 6 reps
    • Add a little weight and practice form – further preparing for heavier presses
  • Warmup Set 3: 135 for 3 reps
    • Here I have enough weight to feel it. To preserve my energy for the big presses I only do 2-3 reps.

After warming up I’ll take a 2-3 minute rest and then do 2 working sets.

Set 1: The maximum weight I can do for the desired rep range.

Set 2: Drop weight by approximately 10% – take 2-5 minutes rest. The goal of the second working set is to do (1) one more rep than I did in Set 1. So if I did 7 reps in Set 1 – I will do 8 reps in Set 2 and then stop.

Even if I can do more reps I stop. I never go to failure.

I was told this helps you progress and although I don’t know the science behind it I can tell you that I have almost always progressed in weight/reps – even during when I’m cutting and in a caloric deficit (which is not common).

My Exact Leangains Workout

Monday:

  • Deadlift 3-5x
  • Overhead Press 6-8x
  • Weighted Chin Ups 4-6x (I got this weighted dip belt on Amazon)
  • Barbell Rows 6-8x
  • 1 set of Weighted Close Grip Chin Ups 6-10x

Wednesday:

  • Bench Press 6-8x
  • Incline Dumbbell Press 6-8x
  • Barbell Curls 6-8x
  • Tricep Extensions 6-8x

Friday:

  • Squat 6-8x (I use these Rehband knee sleeves for knee protection)
  • Leg Curls 6-8x
  • Leg Extension 6-8x
  • Weighted Wide Dips 6-8x
  • Calves 12-16x
  • 1 set of Ab Rope Pulldowns 25x

Get Used to Working Out Less

At first it may be hard to convince yourself to workout less. (3) Three days a week and (2) two sets per exercise are much less than I was doing before. I struggled with it at first because it didn’t “feel” like I was doing enough.

The key is to get it done, do it right and then force yourself to get out of the gym. For me the results don’t lie.

http://www.malandarras.com/intermittent-fasting-and-leangains-transformation-with-photos

Leangains.com