Kale Salad Recipes

Standard

Raw Tuscan Kale Salad

raw_kale_salad_recipe

I doubled up on the breadcrumbs here. Because who doesn’t like a bit of extra crunch? That is reflected in the recipe below. And for those of you without access to pecorino, freshly grated Parmesan would be a reasonable substitute. 

1 bunch Tuscan kale (for ex: black or lacinato)
2 thin slices country bread, or two handfuls good, homemade coarse breadcrumbs

1/2 garlic clove
1/4 teaspoon kosher salt, plus a pinch

1/4 cup (or small handful) grated pecorino cheese, plus adiitional for garnish

3 tablespoons extra-virgin olive oil, plus additional for garnish

Freshly squeezed juice of one lemon (scant 1/4 cup or ~50ml)

1/8 teaspoon red pepper flakes
Freshly ground black pepper to taste

Trim the bottom few inches off the kale stems and discard. Slice the kale into 3/4-inch ribbons. You should have 4 to 5 cups. Place the kale in a large bowl.

If using the bread, toast it until golden brown on both sides and dry throughout. Tear into small pieces and pulse in a food processor until the mixture forms coarse crumbs, or crumbs to your liking.

Using a mortar and pestle or a knife, pound or mince the garlic and 1/4 teaspoon of salt into a paste. Transfer the garlic to a small bowl. Add 1/4 cup cheese, 3 tablespoons oil, lemon juice, pinch of salt, pepper flakes, and black pepper and whisk to combine. Pour the dressing over the kale and toss very well (the dressing will be thick and need lots of tossing to coat the leaves).. Let the salad sit for 5 minutes, then serve topped with the bread crumbs, additional cheese, and a drizzle of oil.

Adapted from the Raw Tuscan Kale Salad with Chiles and Pecorino recipe in Melissa Clark’s In the Kitchen with A Good Appetite.

Prep time: 10 min – Cook time: 5 min

http://www.101cookbooks.com/archives/raw-tuscan-kale-salad-recipe.html


kale salad with pecorino and walnuts

9500878199_586dd4b7011/2 cup (105 grams or 3 3/4 ounces) walnut halves or pieces
1/4 cup (45 grams or 1 1/2 ounces) golden raisins
1 tablespoon white wine vinegar
1 tablespoon water
1/4 cup panko (15 grams or 1/2 ounce) or slightly coarse homemade breadcrumbs (from a thin slice of hearty bread)
1 tiny clove garlic, minced or pressed
Coarse or kosher salt
3 tablespoons olive oil
1 bunch (about 14 ounces or 400 grams) tuscan kale (also known as black or lacinato kale; this is the thinner, flatter leaf variety), washed and patted dry
2 ounces (55 grams) pecorino cheese, grated or ground in a food processor, which makes it delightfully rubbly (1/2 cup total)
Juice of half a lemon
Freshly ground black pepper or red pepper flakes, to tastePrepare walnuts: Heat oven to 350. Toast walnuts on a baking sheet for 10 minutes, tossing once. Let cool and coarsely chop.

Prepare raisins: In a small saucepan over low heat, simmer white wine vinegar, water and raisins for 5 minutes, until plump and soft. Set aside in liquid.

Prepare crumbs: Toast bread crumbs, garlic and 2 teaspoons of the olive oil in a skillet together with a pinch of salt until golden. Set aside.

Prepare kale: Trim heavy stems off kale and remove ribs. I always find removing the ribs annoying with a knife, because the leaves want to roll in on the knife and make it hard to get a clean cut. Instead, I’ve taken to tearing the ribs off with my fingers, which is much easier for me. Stack sections of leaves and roll them into a tube, then cut them into very thin ribbons crosswise.

Assemble salad: Put kale in a large bowl. Add pecorino, walnuts and raisins (leaving any leftover vinegar mixture in dish), remaining 2 tablespoons olive oil and lemon juice and toss until all the kale ribbons are coated. Taste and adjust seasonings with salt, pepper and some of the reserved vinegar mixture from the raisins, if needed. Let sit for 10 minutes before serving, if you can, as it helps the ingredients come together. Just before serving, toss with breadcrumbs and, if needed, a final 1 teaspoon drizzle of olive oil.

http://smittenkitchen.com/blog/2013/08/kale-salad-with-pecorino-and-walnuts/


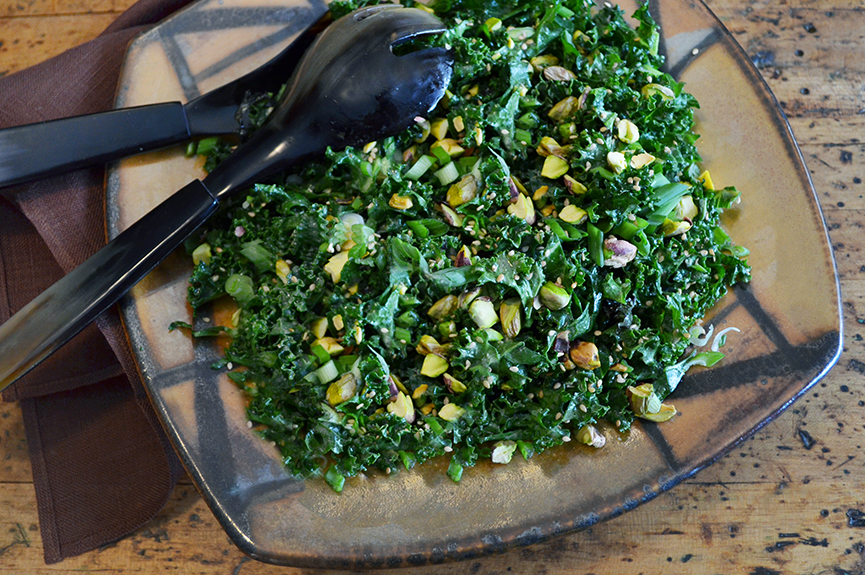
Kale Salad with Miso & Pistachios

Kale-Salad

Ingredient List

  • 1  1/2 pounds kale—stems discarded and leaves thinly sliced
  • 3 tablespoons fresh lemon juice
  • Kosher salt
  • 2 tablespoons apple cider vinegar
  • 2 tablespoons sesame seeds, lightly crushed
  • 1 tablespoon brown miso
  • 1 teaspoon dark brown sugar
  • 3 tablespoons extra-virgin olive oil
  • 2 scallions, thinly sliced
  • 1/4 cup unsalted roasted pistachios, chopped

    Instructions

    Total Time: 25 min
    Servings: 6

    In a large bowl, toss the kale with the lemon juice and a generous pinch of salt.

    In a small bowl, whisk the vinegar with the sesame seeds, miso and sugar. Gradually whisk in the oil. Add the dressing to the kale and toss well. Scatter the scallions and pistachios on top and serve.

    http://andrewzimmern.com/2014/01/27/kale-salad-miso-pistachios/

Paleo Sweets

Standard

tumblr_inline_nei664NXUA1qdei8mPUMPKIN AND CARROT MUFFINS

Makes 12 muffins

Ingredients:

  • 3 large eggs at room temperature
  • 4 medium carrots, grated and squeezed of juice (final volume: 1½ cups shredded carrots)
  • 1½ cups almond flour, spooned and leveled
  • 1½ teaspoons five spice powder (if you must, you can substitute pumpkin spice blend)
  • 1 teaspoons baking soda
  • ½ teaspoon cream of tartar
  • ½ teaspoon ground cinnamon
  • ⅛ teaspoon fine sea salt
  • ¾ cup canned pumpkin purée
  • ½ cup local honey
  • 2 tablespoons almond butter
  • 1 teaspoon melted coconut oil, and a bit extra for greasing the muffin tin if not using paper liners
  • 1 tablespoon sliced almonds
  • 1 tablespoon toasted pumpkin seeds

http://nomnompaleo.com/post/101828602863/paleo-pumpkin-and-carrot-muffins

granola-bars-main-large

Granola Bars Recipe

Preparation time PREP: 15 min. + 24hrs.Cooking time COOK: 1h.

Ingredients

  • 4 cups of assorted nuts;
  • 1 cup shredded coconut;
  • 1 cup of dried fruit; (dates, raisin, etc.)
  • 1/3 cup coconut oil;
  • 1/3 cup almond butter;
  • ¼ cup raw honey;
  • 1 tsp. vanilla extract ;
  • 1 tsp. cinnamon;
  • 1 tbsp. sea salt;

http://paleoleap.com/granola-bars/

paleo-leap-154

Chocolate nut granola Recipe

Serves 4

Ingredients

  • 1 cup walnuts;
  • 1 cup almonds;
  • pinch of salt;
  • 1/4 cup raw honey;
  • 3 tbsp butter or clarified butter;
  • 3 tbsp cocoa powder;
  • 1/2 tsp vanilla extract;
  • 1/2 cup shredded coconut;
  • 2 oz dark chocolate;

http://paleoleap.com/chocolate-nut-granola/

IMG_2985

sweet potato pecan pie

For the crust:
1 ½ C pecans
1/2 cup plus 2 tablespoons arrowroot (plus more for dusting)
1 tablespoon coconut flour
⅛ t salt
2 tablespoons butter, (coconut oil for a dairy-free version)
2 tablespoons honey
1 egg yolk

For the sweet potato filling:
1 1/2 cups cooked mashed sweet potato
2 T honey
1 t cinnamon
½ t ground ginger
½ t freshly grated nutmeg
1 egg

For the pecan topping:
1 cup pecans
3 eggs
1/4 cup honey
1/4 cup coconut sugar
1 teaspoon vanilla extract

http://zenbellycatering.com/2013/11/13/sweet-potato-pecan-pie/

protein-pancakes

Coconut Chia Protein Pancakes Recipe

Total Time: 20 minutes
Serves: 2

INGREDIENTS:

http://draxe.com/recipe/coconut-chia-protein-pancakes/

paleogranola1

Sweet & Salty Homemade Granola

Ingredients
  1. 1 cup cashews
  2. 3/4 cup almonds
  3. 1/4 cup pumpkin seeds, shelled
  4. 1/4 cup sunflower seeds, shelled
  5. 1/2 cup unsweetened coconut flakes
  6. 1/4 cup coconut oil
  7. 1/4 cup honey
  8. 1 tsp vanilla
  9. 1 cup dried cranberries
  10. 1 tsp salt

http://paleogrubs.com/granola-recipe

Paleo Pizza/Pizza Crust

Standard

paleo-leap-68

Paleo pizza recipe

Serves 4

Crust ingredients

  • ½ cup coconut flour;
  • 1 cup almond meal;
  • 1 tsp baking powder;
  • 2 tsp garlic powder;
  • 4 eggs;
  • 3 tbsp extra-virgin olive oil;
  • ½ cup coconut milk;

Topping ingredients

  • A few tbsp tomato pesto or of your favorite tomato sauce;
  • 8 sun-dried tomatoes, chopped;
  • 3 artichoke hearts, chopped;
  • 8 button mushrooms, sliced;
  • 1 tbsp coconut oil, for cooking;
  • 50g-100g good quality cooked ham, shaved (amount depends on your preference);

newyorkstylepaleopizzacrust

NY Style Pizza Crust

1 tablespoon gluten-free yeast
1 tablespoon raw honey
1/4 cup warm water (should feel warm on the inside of your wrist, but not burn)

3/4 cup almond flour
3/4 cup tapioca starch
3/4 teaspoon sea salt

1 tablespoon olive oil (or other melted fat if you’re opposed to heating olive oil)
1 tablespoon egg whites (less than one egg)
1 1/2 teaspoons apple cider vinegar

and of course your favorite toppings!

pizza0

Cauliflower Crust Bacon Pizza

MAKES: 3-4 MINI PIES

ingredients:

365 organic tomato basil sauce
1 head cauliflower
2 egg whites
coconut flour (tropical traditions)
1 med-large onion
2/3 cup spinach
1/2 cup bacon bits
spices
garlic powder
Italian seasoning (oregano, marjoram, thyme, basil, rosemary, sage)
crushed black pepper

directions:

  1. Preheat oven to 400°F.
  2. Rinse and prepare cauliflower into a rice-like texture. You can finely shred in a food processor or grate by hand.
  3. Put cauliflower “rice” in a large pot and steam till soft. Set aside and let cool.
  4. Take ~3 strips of (beef) bacon, cook and shred into little bits.
  5. Cook spinach and warm up your sauce.
  6. Cut onion into rings and fry till soft and caramelized.
  7. Take your cooled down cauliflower and add spices, eggs whites and spoonful of coconut flour to bind it. Mix and separate into even portions.
  8. Place parchment paper on a baking sheet. Mold each portion into a pie crust on your paper and place into hot oven.
  9. Cook crust for 15 minutes or until it feels firm (it will depend on how thick you make the pies and how wet the cauliflower is.)
  10. Take out of oven and add warm sauce and layer your toppings. I start with spinach, then onions, and then bacon.

carrot crust

CARROT CRUST

Ingredients

  • 4 cups of grated, and squeezed* carrots
  • 2 tablespoons butter
  • 3 eggs
  • 4 tablespoons coconut flour
  • 1/2 teaspoon sea salt
  • freshly ground pepper to taste
  • 1/2 teaspoon cardamom (optional, and I included it for the lamb bastila, for which I made the crust)

Process

  1. Preheat the oven to 180C (about 350F). Prepare a springform cake tin as follows: butter the bottom and sides and line with parchment paper. The butter is used so the paper will adhere to the pan.
  2. Add some olive oil (or additional, melted butter) on top of the paper and with your hands or a paper towel, spread the oil around the parchment paper. Set aside.
  3. Peel about 6-8 large carrots. I used a hand grater to grate them. Then I squeezed the water (carrot juice) out of them and measured the “dried” results into 4 cups. (I used a dry ingredients U.S. measuring cup.)
  4. Place the grated carrots in a large bowl. Add the butter and eggs, and with your hands mix well, cutting the butter into the mixture.
  5. Add the coconut flour and spices, and knead until all is well blended.
  6. Scoop the carrot mixture into the prepared cake tin and using your hands, spread it out evenly to form a pie shell (covering the sides of the tin as well as the bottom).  
  7. Baking time depends on what you will make with the crust afterwards. I baked mine for 35 minutes and then baked it again with the filling another 25 minutes.

Pizza Crusts: http://paleononpaleo.com/paleo-pizza/

Creative Pizza Crusts: http://paleogrubs.com/pizza-crust-recipes

My bone broth didn’t gel / Saving the Fat?

Standard

Health-Benefits-Bone-Broth-PrimallyInspired.com_1-e1385761220433

There are three, and only three, reasons why broth doesn’t gel.

BUT FIRST, SOME CLARIFICATIONS.

To make bone broth, you really only need a couple things: bones and water. Everything else is helpful (like adding something acidic to help leach the minerals out of the bones), or tasty (like adding onions and other aromatics to the concoction). But at it’s heart, bones and water are the foundation of a good broth.

There are two types of bones you can use when making homemade bone broth: jointy bonesand meaty bones. And before you say anything else, YES. Those are their scientific names!

Jointy bones are cartilage-rich bones and connective tissues that contain joints — chicken feet, wings, and necks, cow knuckles and ox tails.

Meaty bones have a bit of meat on them (like ribs) or marrow in them (like soup or marrow bones).

And finally, to get the most nutrients out of your broth, you’ll want to source good bones from healthy, pasture-raised or wild animals.

REASON 1: NOT ENOUGH JOINTY BONES IN PROPORTION TO MEATY BONES.

As a good rule of thumb, you want at least half the bones to be jointy bones, if not more. If your goal is a broth that gels, you can’t simply throw in one or two joints (or none at all). If using a whole chicken carcass, try cutting up the wings and neck and/or throwing in extra feet or necks to make sure you’ve got enough jointy bones to cause the broth to gel. (HINT: I buy extra feet and necks from my farmer for $1 per pound. They’re cheap because nobody else wants them. GO FIGURE.)

YOU NEED JOINTS. They’re full of the connective tissue that breaks down into gelatin.

REASON 2: TOO MUCH WATER IN PROPORTION TO BONES.

It’s a volume thing. You want to look into your stock pot and see it FULL of bones, barely covered by the filtered water you added. For chicken bone broth, this comes to about 3-4 pounds of bones (about 2 whole carcasses) per gallon of water. For beef bone broth, this comes to about 7 pounds of bones per gallon of water.

Don’t go stingy on the bones, not if you want that broth to gel.

REASON 3: YOU BOILED THE BONE BROTH TOO VIGOROUSLY.

What you want is a beautiful, rolling simmer that barely moves the surface of the water in the stock pot.

If it boils too forcefully, it will break down the proteins in the gelatin into their constituent amino acids. While that’s not bad, per se, it will certainly prevent your broth from gelling.

 http://www.foodrenegade.com/why-your-bone-broth-doesnt-gel/

1. Your bone broth didn’t gel because you used too much water.

This is the most common mistake of making bone broth. The ratio of bones to water is very important. Use only use enough water to completely cover the bones.

2. Your bone broth didn’t gel because you used low-quality bones. 

Conventional factory farmed animal bones don’t produce much gelatin. Use pasture raised animal bones for best results. Feet, oxtail and knuckle bones are the best for producing a gelatin rich bone broth.

3. Your bone broth didn’t gel because your stock was not cooked long enough.

It takes a long time to extract the minerals, nutrients and gelatin out of bones! Follow these cooking times:

  • Chicken and Turkey Bones: 8 to 24 hours
  • Beef, Lamb and Pork Bones: 12 to 72 hours
  • Fish Heads and Bones: 4 to 24 hours

4. Your bone broth didn’t gel because your simmering temperature was too high.

Simmering bone broth at higher heats can actually destroy the collagen and form MSG. It’s very important to turn the heat way down to the lowest possible setting when making bone broth.

5. Your bone broth didn’t gel because you didn’t use enough bones.

Try adding more bones or include bones like knuckle bones, feet, heads, and oxtails. Remember, the ratio of bones to water is very important. Only add enough water to completely cover the bones.


Save the Fat?

Should you save or toss the fat on top of the broth? Ask any of your paleo friends and they’ll probably have a strong opinion about this. Some save the fat and use it for cooking. Some throw it away citing possible toxins (if you’re making a chicken bone broth – the fat on top could be high in polyunsaturated fatty acids so you may want to toss that). Our paleolithic ancestors probably ate the fat. Really, it’s up to you.

Here’s what I do – I leave the fat on top of the broth until I’m ready to use it or ready to store it in the freezer. Then, I toss the fat. The fat is what keeps bacteria from entering the beef jello. My thought is that if it’s acting as a barrier between bacteria and broth… then I don’t want to eat it. That said, I’m not sure I won’t change my mind about this one day. It does pain me to waste what looks like delicious fat.

http://myheartbeets.com/beef-bone-broth/


http://www.eatyourbeets.com/recipes/how-to-make-your-own-healing-bone-broth/

hunger suppressant

Standard
Eat more fat 

It may seem counterintuitive, but eating more fat is a smart weight-loss strategy–as long as it’s the right kind.

Researchers at UC Irvine discovered that oleic acid, a “good” fat, helps trigger the small intestine to produce oleoylethanolamide, a compound that finds its way to nerve endings and transmits a hunger-curbing message to the brain.

Great sources include nuts, avocado and extra virgin olive oil. Bonus: fat also delays stomach emptying, which keeps you fuller longer.

Get an endorphin rush

In one Brazilian study, researchers found that in addition to burning calories and revving up metabolism, exercise can restore the sensitivity of neurons involved in satiety, which in turn, naturally curbs food consumption.

Even a walk will do. Another study from the University of Exeter found that taking a 15-minute walk, rather than a 15 minute break, cut snacking at work by 50 percent.

Slow down

If you tend to eat on-the-go and gobble down your food, work on s-l-o-w-i-n-g it down. A study published in the Journal of Clinical Endocrinology & Metabolism found that eating too quickly curtails the release of hormones that induce feelings of fullness, which can trigger mindless overeating. Another University of Rhode Island study found that slow eaters take in about four times fewer calories per minute, and experience a higher level of satiety, despite eating less food.

To get on board, put your utensil or food down between every bite, take a deep breath, and stop eating when you feel you’ve had just enough, even if you haven’t cleaned your plate.


Green Tea

Nutritionists say that the catechins in green tea help to inhibit the movement of glucose into fat cells, which slows the rise of blood sugar and prevents high insulin and subsequent fat storage. And when your blood sugar is more stable so is your hunger!

Almonds

Just a handful of almonds is a rich source of antioxidants, vitamin E, and magnesium.

Coffee

Coffee’s secret? Caffeine, along with antioxidants from the coffee beans.

Ginger

For centuries, many cultures have used ginger root for its amazing digestive powers. Ginger works as a stimulant that energizes the body and improves digestion, thereby making you less hungry.

Avocados

Full of fiber and heart-healthy monounsaturated fat, avocados suppress appetite when eaten in moderation.

Salmon

When you eat fish like salmon that are high in omega-3 fatty acids, your body increases the amount of the hormone leptin in your system. Leptin is known for suppressing hunger. Don’t like salmon? Try tuna and herring, which are also high in omega-3s!

Flax Seed

With a nutritional mix of soluble fiber and essential fatty acids, flax seeds are the perfect addition to your yogurt, smoothie, or salad. In fact, ground or whole, flax seeds help you to stay satiated and fueled!

Cayenne Pepper

Get spicy! Just half a teaspoon of cayenne pepper can boost metabolism and cause the body to burn an extra 10 calories on its own.

Apples

Apples are filled with soluble fiber and pectin, and also regulate your glucose and boost your energy level. Apples require lots of chewing time, which helps slow you down and gives your body more time to realize that you’re no longer hungry.

Eggs

Studies have shown that eating an egg or two for breakfast can help dieters feel more full over 24 hours.

Sweet Potatos

According to food scientists, potatoes contain a special type of starch that resists digestive enzymes. Plus, they’re full of vitamin A and vitamin C!

Dark Chocolate

Try slowly savoring a piece or two of dark chocolate with at least 70 percent cocoa. Just a little dark chocolate helps to lower your cravings because the bitter taste signals the body to decrease your appetite. Not to mention that the steric acid in dark chocolate helps slow digestion to help you feel fuller longer.

Cinnamon

Cinnamon, like other ground spices such as cloves and ginger, helps lower your blood sugar levels, which helps to control your appetite!

100 Day Gong

Standard

Paying attention to your intentions.


Gong in Chinese is a designated amount of time that you allot to perform a specific task daily. For example, knowing that it takes at least 90 days for a particular good habit to “burn into” your nervous system, I have found that the 100 Day Gong is the most appropriate length to practice. This means that we pick a particular practice (or set of practices) and designate them as our Gong and we diligently practice them every day for 100 days without fail. This means that if you miss a day, even if its day 99, you start over. Not only does this build resolve, it forces us to wake up and pay attention to our day-to-day routines. It is incredibly painful when you miss day 46, for instance and have to start over. At first you try to make excuses to yourself about how it was OK and how you’ll just keep going, but then, a deal is a deal…you start over. Next round, you pay attention! It is a wonderful way of not only building focus and determination, but also to ensure that you train regularly. It is a dedicated act of self-love that snaps you out of your daily trance and brings the light of awareness to your consciousness. The more we practice, the more we wake up and the better off we are.

I do these all of the time in my personal life and development. I set goals for myself for the next 100 days (physical, mental, spiritual) and I look at them daily and I reinforce my Sub Conscious mind every day for those hundred days. When it is over, I assess where I am and take a few days of introspection and meditation before I set my next gong. In essence, I allow my Super Conscious mind to guide me into the next series of programs for the Sub Conscious mind. This is a wonderful method for bringing the Self Conscious mind into the equation and tie all aspects together- again, harmonizing Yin and Yang.


Doing a 100 day gong is a way of making that important commitment to yourself and holding yourself accountable if you fall off of the wagon. 100 days seems like a long time, but if there are things you know you should be doing, things that you know can change your life in a positive way, then make the damn commitment and follow through with positive change.

http://crazyhappyhealthy.com/100-day-gong-change-habits-honor-body-improve-life/

elimination provocation diet

Standard

Food sensitivities are shiftier and can exact an even greater toll on our health because they’re more challenging to identify, often causing the ensuing cellular inflammation to rage on for years. Many people have food sensitivities and have no idea.

Because a food sensitivity often rears its ugly head a few days after the offender is eaten, it can make it difficult to trace the irritation to a particular food. Identifying these rabble rousers can have a profound effect on your health, as silent inflammation is a major player in the onset of all degenerative diseases, according to the functional medicine community.

Symptoms of food sensitivities include, but are not limited to: fatigue, drowsiness after eating, brain fog, poor memory and concentration, agitation, mood swings, intense cravings (especially sugar, refined carbs, and starch), abdominal cramping, difficulty losing weight, depression, restlessness, irritability, headaches (including migraines), swollen and painful joints, muscle pain and stiffness, gas, bloating, flatulence, indigestion, heartburn, constipation, blurry vision, broken sleep, skin issues (eczema, psoriasis, acne), recurring sinusitis, and asthma.

Dang, right?

Here’s another kicker. Eating foods that we are sensitive to can also up the ante on autoimmunity, including autoimmune hypothyroidism (Hashimoto’s). Just as the body launches a seek-and-destroy mission on the thyroid in the case of Hashimoto’s, the body will also see offending or inflammatory foods as the enemy and will antagonize the whole autoimmune response, making it difficult to get a handle on Hashimoto’s, or any autoimmune condition.

And…eating foods that our bodies see as “enemies” also increases our stress response, causing our adrenals to pump out even more stress hormones (adrenaline and cortisol). So while having a food sensitivity itself can cause people to hold on to weight or gain weight, wayward cortisol (“the belly fat hormone”) sets up camp around our midsection.

How To Snuff out the Fire

This Elimination/Provocation Diet (eliminate, then provoke the body) is very telling and can have a life-changing impact on your long-term health. It can be one of the most important things you ever do for your wellbeing and is considered “the gold standard” for identifying foods that don’t love you back. (Forget blood (ALCAT, for example) or skin testing for food sensitivities – these tests are a waste of time and money, as they’re been repeatedly proven to be inconclusive.)

Eliminate these foods 100% for three weeks:

  • eggs
  • dairy
  • gluten (including wheat, barley, and rye) *
  • soy
  • nightshades (eggplant, tomatoes, potatoes, tobacco, and peppers, including cayenne powder)
  • corn
  • nuts
  • peanuts (which are legumes, not nuts)
  • shellfish

* If you have Hashimoto’s, gluten should be categorically, 100% avoided, always. Do not reintroduce.

After three weeks of this clean slate, reintroduce each food one at a time, eating 3-4 servings of that specific food on your reintroduction day. (Nightshades and nuts don’t need to be separated out, meaning on the day of your nightshade reintroduction, you can eat any and all nightshades and on the day of nut reintroduction, you can eat any and all nuts.)

Monitor symptoms for 2-3 days. If you have a reaction, BAM. There’s your answer. Reactions include an acute occurance of any of the symptoms listed above.

If you have a reaction, eliminate that food for approximately three more months while you continue to take a quality probiotic, glutamine, and to drink bone broth. If you think three months is a long time, ask yourself if you’re willing to live with your symptoms – and your autoimmunity. What if, after three or so months, your gut was healed (for some, it takes longer) and you could reintroduce that prior troublemaker without problems? When you think about the span of your lifetime, three months just doesn’t seem like that long, does it?

An easy way to eliminate these potentially offending foods is to use a combination of 1. Sarah Schatz’s amazing meal plans and; 2. Dr. Mark Hyman’s Ultra Simple Diet. In his book by the same name, he shares a shopping list, meal plans, and recipes. These resources offer the easiest (and most enjoyable) way I know of to eat well and keep blood sugar balanced during this “diet.” (I hate that word.) This is a cleansing and detoxifying diet, and many people feel amazing – lighter and brighter, more energetic, more positive, and most people report losing a few pounds within a mere week.

Please know that elimination of foods we’re sensitive to can cause withdrawal symptoms for some people, such as fatigue, headache, or mild skin reactions. These usually subside in 2-3 days, so don’t despair. Taking a heaping teaspoon of powdered fiber (not Metamucil – something like this (or any gluten free psyllium, triphala, or acacia fiber)) in 8 oz. of water and/or taking activated charcoal capsules can alleviate symptoms quickly.

Recommendations and tips:

  • Read all food labels – the food industry can be tricky with naming ingredients.
  • Many prepared foods have hidden additives and fillers that contain wheat and egg byproducts.
  • Avoid packaged, canned, and convenience foods during this “diet.” (I hate that word.)

https://www.healthfulelements.com/blog/2012/09/foods-dont-love-you-back


Quick overview:

•    Prior to starting, take a week to journal/document all foods eaten within a day and perform for 7 consecutive days.
•    Document all physical, behavioral, and emotional concerns to determine a baseline.
•    Set a date on the calendar to start the program. (Allow for mental preparation.)
•    Plan meals in advance to ensure sticking to the program.

Action Steps:

•    Eliminate the most common foods that trigger sensitivities: gluten, dairy, eggs, corn, and soy.
•    Eliminate for two to four weeks, and then reintroduce each food, one at a time, every 72-96 hours.
•    Monitor yourself closely for reactions, which can be emotional, behavioral, physical, cognitive, and social.
•    When reintroducing a food group (dairy), make sure to journal all symptoms and any changes in behavior for up to 4 days.
•    Make sure to also document the time of day and the intensity of reactions.
•    If no reactions occur upon reintroduction, still proceed with caution by rotating that food group with a frequency of every 2-3 days to avoid re-reaction.
•    After 4-6 weeks, a more regular eating schedule is usually appropriate for the previously offending food.
•    When offending foods are found upon reintroduction, remove that food group for another 2-3 months, followed by the above reintroduction plan.

Most common foods that trigger sensitivities are: gluten, dairy, eggs, corn, and soy. 

Foods to avoid

•    ALL processed sugars and sweeteners.
•    Grains: Wheat, oats, rice, barley, buckwheat, corn, quinoa, etc.
•    Dairy: Milk, cream, cheese, butter, whey. Ghee is OK.
•    Eggs or foods that contain eggs (such as mayonnaise)
•    Soy: Soy milk, soy sauce, tofu, tempeh, soy protein, etc.
•    ALL processed foods
•    Canned foods

Foods to include

•    All veggies:  Asparagus, spinach, lettuce, broccoli, beets, cauliflower, carrots, celery, artichokes, garlic, onions, zucchini, squash, rhubarb, cucumbers, turnips, watercress, etc. ( I realize that many of your children don’t eat any of these, so just try to incorporate as many veggies as possible.).
•    Meats: Fish, chicken, beef, lamb, organ meats, etc. Best choices are grass-fed and preferably from a local farm.
•    All fruits
•    Gluten-free grain: quinoa, tapioca, and sorghum.
•    All rice
•    Nuts and seeds
•    Coconut: Coconut oil, coconut butter, coconut milk, coconut cream.
•    Olives and olive oil


The basic idea is: autoimmune disorders begin in the gut as it is from the intestines that nutrients are absorbed (or not) into the bloodstream and that foods that we are sensitive to can rupture the gut lining, so to speak, and cause other things besides nutrients to pass into the bloodstream (like undigested food, which gets attacked by your immune system which senses an invader-this is known as “leaky gut”).

Avoiding foods that may have an adverse effect on digestion, as improper digestion due to hard-to-digest foods is thought to be the cause of all autoimmune disorders.

So the deal with an elimination diet is: cut a bunch of stuff out at once, give it long enough to get out of your system; add it back in one at a time. Observe and record results. Repeat if necessary.

So I dug in, and decided it was time for a Whole30. Basically they created a 30 day Paleo reboot where you are challenged to only eat Whole foods for 30 days. You do not consume any grains on the program, which I’d already eliminated. In addition, I took their clean eating Paleo approach and cut out dairy, legumes, any added sweetener, artificial or real, and seed oils (canola, corn, etc), and alcohol. As per the Whole30, we put away the scale for 30 days. On top of that, I followed the Paleo Autoimmune Protocol and cut out seeds, nuts, nightshades (tomato, potato, peppers, eggplant) eggs, and caffeine.

http://www.liaprusha.com/?p=42

zoodler noodler recipes

Standard

1. Pistachio Kale Pesto With Zucchini Noodles and Cherries

Talk about a tasty way to get those greens. Made with homemade pesto, antioxidant-rich cherries, lemon zest, and raw zoodles, this simple dish brings summer flavors back to your mouth any time of year. Tip: Use dried cherries in place of fresh if the fruit isn’t in season.

2. Thai Peanut Zucchini Noodles

Instead of turning to takeout, try this simple recipe. With the best of Thai flavors (peanut butter, cashews, chili, and cashews) and a refreshing touch of basil, mint, and cilantro, you may break up with delivery for good. Though the dish is awesome as is, it also tastes great with an added protein like chicken or tofu.

3. Healthy Zucchini Pasta Carbonara

The recipe creator isn’t kidding when she says the flavor will “make your heart swoon.” Full of all the amazing ingredients that make carbonara so decadent (and delicious), the zucchini is a perfect way to lighten up the rich classic. To make it even healthier, try turkey bacon or chicken sausage in place of the pancetta.

4. Zucchini Noodles With Fig, Arugula, and Pancetta

Though this recipe is relatively low-carb, it’s as filling and satisfying as a dish with actual pasta. Made with fresh figs, arugula, basil, pancetta, and pecorino Romano cheese, it’ll be hard not to demolish the entire bowl. (And it’s totally fine if you do.)

5. Zucchini Noodles With Pesto

This recipe just might be the easiest meal you’ll ever make. Though it uses homemade pesto, it tastes just as great with store-bought varieties, taking the prep time to less than five minutes. Top with cherry tomatoes, Parmesan cheese, and a dash of salt and pepper, and enjoy.

6. Ginger Zucchini Noodle Egg Drop Soup

When cold season rears its germy head, few things sound better than a hot bowl of noodle soup. Instead of turning to a can or takeout, try whipping up your own batch. Easy, inexpensive, and perfect for leftovers, this Asian twist on zoodle soup will have you feeling healthier in no time.

7. Avocado-Basil Zucchini Noodles With Chile-Lime Shrimp and Corn

Light, healthy, and a good source of lean protein, this zoodle dish is an easy and delicious lunch or dinner option. Though avocado and corn are best during summer months, it’s easy to adjust the flavors for any season. Our fall favorite: subbing pesto for avocado and sun-dried tomatoes for corn.

8. Kung Pao Chicken Zoodles for Two

There’s kung pao chicken, and there’s kung pao chicken zoodles. Made with the same amazing flavors of the Chinese favorite (like peanuts, scallions, and ginger), this recipe adds a veggie base and sticks to homemade sauce to keep things healthier. Plus, cooking is way more fun than dialing for takeout.

9. Zucchini Spaghetti With Lentil Marinara

Marinara sauce is delicious, but it can also get boring—and fast. An easy and healthy option, homemade lentil marinara is a delicious alternate that provides more protein and fiber. Made with herbs, lentils, diced tomatoes, garlic, and a hearty pile of zoodles, spaghetti will never be the same. (In a good way.)

http://greatist.com/eat/healthy-zucchini-noodle-recipes

Wild is even Better than Organic

Standard

Wild is even Better than Organic

Why wild is better than organic:

Wild edibles give us a wonderful opportunity to expand our food resources and bring incredible variety to our diet. Wheat grass, weeds and other wild edibles are actually better than organically grown vegetables in many ways.

A lot of organic farms are near roads and other farms that use pesticides. Whereas wild edibles growing in the middle of forests, or other secluded locations are not as close to common pollutants like traffic.

Some other reasons why wild is better than organic are: they are free; they have longer roots, they are healthier, heartier crops that require very little water; you are eating locally; and opening up the choice the foods exponentially.

People have been safely eating wild edibles for centuries.

Native American cultures, and other perceived “primitive” cultures have been safely consuming wild edibles for centuries. However, it might surprise you to learn that General George Washington issued a directive to all of his soldiers in 1777 to go and pick wild edibles to “prevent scurvy and all putrid disorders” (Food in American History Part 10 – Greens).

Since then many books have been written about the healthy benefits of wild edibles.

Wild edibles also level the healthy playing field. Being healthy is a birthright. You can be healthy even if you are not wealthy! Buying large amounts of organic green vegetables can get really expensive! Being wild sets a whole new standard for fresh healthy food, and it is available to anyone! Forget the notion that “you are not allowed to be healthy unless you are wealthy”.

I was inspired by Sergei’s fantastic presentation and bought some of his recommended books on wild edibles. I am now a convert, and am reaping the wild rewards! I encourage you to do the same – with caution.

Always arm yourself with knowledge. Research the poisonous wild edibles in your local area, and do some research before picking and eating anything. Introduce new wild edibles slowly, in small amounts.

Adopt the look, listen and learn approach. Look for signs of intolerance, listen to your body’s reactions, and learn what works for you. Then teach your body. Everyone is different – be mindful of bio-individuality and experiment to find your perfect wild blend!

Top Wild Edibles to Get you Started!

grass – There are over 400 varieties of grass. Grass is rich in chlorophyll, amino acids, vitamins, minerals and enzymes. If you use organic fertilizer and do not spray chemicals on your grass, Sergei recommends mowing your lawn and pouring it straight into the blender. He told some hilarious stories of doing that with friends. Now that’s what I call “eating from your backyard”!

dandelions – is rich in Vitamins A, B C and D, as well as copper, phosphorous, calcium and magnesium. Dandelions are great for lowering high blood pressure and cholesterol; and are very beneficial for the health of internal organs. They are extremely alkalizing. Dandelions contain a substance similar to insulin, so they can be beneficial to diabetics. The best thing about dandelions, is that there are over three hundred varieties, and none of them are poisonous. These would be one of the most “socially acceptable” wild edibles. Search for Sergei Boutenko’s “dandelion pesto” on You Tube. YUM!

pigweed – is one of the few plant foods that contains omega 3. It tastes like lemon and has a beneficial effect on the heart – being linked to preventing heart disease and improving the immune system. Pigweed is rich in Vitamins A, B6 and C; as well as minerals such as calcium, phosphorous, magnesium and iron. The great thing about pigweed is that it grows prolifically on organic farms where they don’t spray. A lot of health food stores are selling it now, so you don’t have to trek to find it!

lambsquarter or Fat Hen – like pigweed, this grows in abundance on organic farms that don’t spray and is available at some health food stores and co-ops. Lambsquarters taste like wild spinach and are perfect for green smoothies. They are rich in calcium, niacin, folate, iron, magnesium, phosphorous and Vitamin K.

stinging nettles – the interesting thing about these are that they sting, but the juice counteracts the sting. Stinging nettles are rich in protein, chlorophyll, calcium, iron and potassium. They provide arthritic relief, and are good for joint, back and knee pain. They can also assist in alleviating the symptoms of allergies; and are great for getting rid of dandruff!

plantain – is where psyllium husks come from. There are about  seeds all coated with husks, which are really great for digestion. Plantain is fantastic for drawing toxins out of the skin. If you are stung by a bee, use some plantain and it will draw the sting out. It is also great for cuts and bites. Plantain is a fantastic natural anti-wrinkle treatment, and wonderful for other skin disorders such as acne and ecxema. It is rich in calcium, as well as protein and calcium.

hibiscus – rich in Vitamins A, B and C, as well as minerals such as calcium, sodium, chromium, selenium.

nasturtiams – are of particular interest to me as they are great for candida, intestinal worms, stomach aches and constipation. They can also help with lung infections, colds and flus. Nasturtiams also promote the growth of new blood cells. The flowers taste beautiful, but the leaves can be very spicy.

gota cola – is a miracle plant for arthritis. It is also great for nervous disorders and skin impurities.It strengthens the adrenal glands and the libido; It is rich in Vitamins A, B, C, D and K; as well as iodine, calcium, zinc and cobalt.

chickweed – is rich in calcium, iron, and vitamins A, B and C. They also contain powerful flavanoids and triterpenoids.

clover – turns out that a three leaf clover can be lucky for your health! You can eat every clover except for yellow clover. Clovers are great blood purifiers; and fantastic for fighting cancer, hepatitis, mononucleosis, and many eruptive skin disorders.

http://healthyblenderrecipes.com/info/green_smoothies